Depending on which computer manufacturer made your computer, you might have a simple splash screen displayed as the BIOS loads or you might be inundated with advertising throughout the entire boot process. These are two separate image locations requiring editing in multiple places and some confidence in your computing skills, as the BIOS option can potentially damage your system if done incorrectly.
Changing the Windows Boot Screen
I'll start with the Windows boot screen, since that's fairly easy and doesn't necessarily require any direct modification of system files. There are several ways to approach changing the boot screen. One option is to eliminate it completely, opting to display a blank screen until Windows completes the boot process. To turn off the boot logo, Click Start > Run and type MSCONFIG in the run dialog box to launch the System Configuration Utility. On the BOOT.INI tab, check the box next to /NOGUIBOOT and click OK. The next time you reboot your computer, you'll see the BIOS screen and then nothing until Windows loads completely. The downside to this option is you won't get any feedback if your PC gets hung up somewhere in the boot process.

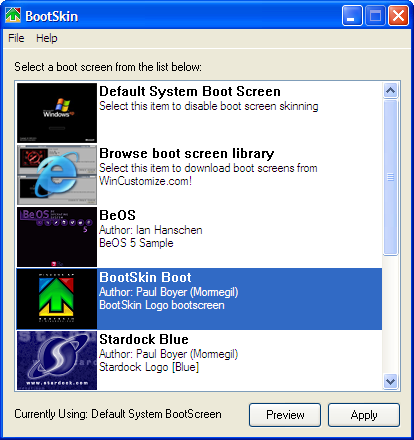
To maintain a more visual boot process, while also eliminating any boot branding, you might simply want to replace the boot image. The easy way to do this is to download a freeware app from WinCustomize called BootSkin. The app automatically overrides the default Windows boot screen, replacing it with one of the many options in the WinCustomize BootSkin library. With some practice you can make your own custom BootSkin as well.
If you want to get really geeky, a third option is to edit the operating system file where the boot screen information resides. You need to be careful in doing this or you can end up with a computer that won't boot. The first part of the process is to create or find an image you want to use. If your computer simply has the all black Windows XP boot screen, with the XP logo like the one pictured below, you don't need a very large image.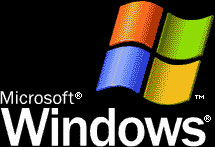
Simply create a 215x147 .bmp file with 16 colors (NOT 16-bit) in any image editor and you've got a working replacement. If your computer manufacturer overrides this default screen with something else, you may need to get creative to eliminate all the branding. In general, using a black background looks more consistent, but you can use any of the 16 colors in your palette.
With your new image created, you need a freeware app called Resource Hacker to make some changes.
Before proceeding, locate ntoskrnl.exe in your Windows > system32 folder. Make a copy of the file called newntoskrnl.exe or something equally easy to remember and leave the copy in the system32 folder.
Make a second copy of the ntoskrnl.exe on your desktop (this is the one you will edit).
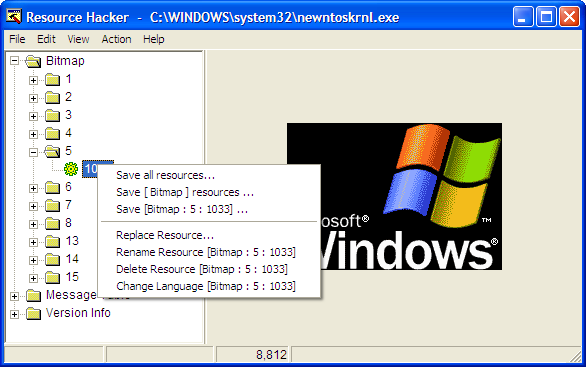
Open ntoskrnl.exe in Resource Hacker. Expand Bitmap > 5 and highlight the 1033 folder. Right-click the 1033 icon and choose Replace Resource.
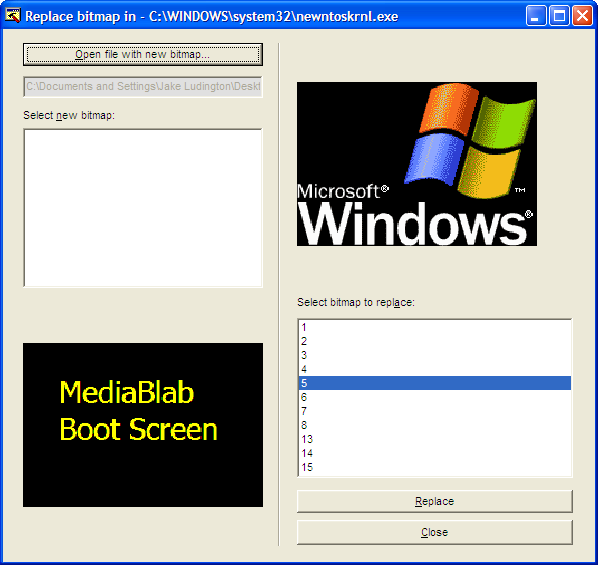
Click the Open file with new bitmap button and locate the image you created earlier. Click the Replace button. Save and exit Resource Hacker. You can optionally replace all elements of the boot screen by editing each portion of the Bitmap.
Reboot into SafeMode and copy your newly created ntoskrnl.exe file into the Windows > system32 folder.
Note: If you are using Windows 2000, you can simply replace the image in the Bitmap > 1 > 1033 location with a 640x480 16 color Bitmap to modify the Win2k boot screen in a similar fashion.
Changing the BIOS Splash Screen
To eliminate the branded splash screen associated with your BIOS, you need to obtain the firmware update for your BIOS and edit the logo file that's part of the BIOS fileset before applying the update. Since every computer model and manufacturer uses a slightly different BIOS configuration, it's important to get the BIOS specific to your computer from the support section of the manufacturer's Website. In some cases, like my HP laptop, it's become virtually impossible to replace the logo because the BIOS flash process is contained in an .exe file that runs locally in Windows rather than from a separate disk.
Assuming your PC manufacturer has you create a floppy designed to flash the PC bios, you can fairly easily make a change to the logo displayed. In following the directions to create the BIOS boot disk, simply replace the included logo.bmp file in the BIOS update package with a logo.bmp file created by you. The key here is to use a 16 color (NOT 16-bit color) 640x480 BMP file. Copy your logo.bmp file onto the disk used for your BIOS update and run the bundled logo.bat file by double-clicking it. This converts the logo.bmp to a format ready for the BIOS update.
It's vital to keep all the files in the BIOS update named exactly as they were or your computer may not work after the update. Any changes made to BIOS update files should be done at your own risk and with extreme care.
No comments:
Post a Comment